Saturday, August 8, 2009

Caraco Jacket - petticoat.

Hello all,
I've finally moved into the new place and the dear hubby is back to work.. blowing things up.


I've been commisioned to make a fitted caraco jacket, stomacher and petticoat for a wonderful customer in the USA. She sent me the fabric, a fantastic printed cotton. Very period correct, beautiful. >>

At first, as always, washed the fabric in cold and dryed on hot. This prevents any shrinkage when the garment is washed. I've been many people spend hundreds of dollars on beautiful items only to have them shrink, stretch and pull after washing.


This garment is going to resemble one found on display at the V&A Museum. <<


Since the fabric is 45" wide using the usual method of petticoat construction would obviously not work, besides the directional nap. In this case I used three lengths. She wanted the petticoat to be 35" long. So I used 3 length 45" x 35". Because of the nap, I matched the pattern and hide the seams as best I could in them and the pleats. The front is unobstructed, there is one seam at each hip and one at the center back... very sneaky if I do say so myself.

I then pleated the waistband into the desired width and basted the pleats. When making a petticoat don't forget to leave a large box pleat at the front center and a smaller one at the back center. When the pleats were basted the pocket slits had to be sewn. Rule of thumb on an average size person is about 8" for the pocket slit. Because the slit wasn't on a seam as they usually are, I had to be very careful about stitching the bottom to re-enforce and prevent the fabric from tearing.

When the pocket slits are done, I used 1/2" cotton twill tape in a natural color (19" on either side + waist measurment) and whip stiched one side down. to prevent the twill from fraing, cutting a dove tail in the end really helps, and makes it look pretty. Even though using a whip stitch I ensured that my needle went through all layers of the pleats. This holds everything together. I then tacked the end firmly shut so when tying the petticoats nothing comes apart, then whipped stich the other side in place covering my previous stitches and basting thread. Now the waist band is completed.


If you have a dress dummy, use one! If not get the closest person in the room to help you. Either have them wear the petticoat and stand on a chair, or if you trust them with pins, wear the petticoat yourself and stand on a chair. Then you, or your helper can pin the bottom of the petticoat into a hem. To help get a strait bottom, meaure with a strait ruler a number of distance from the floor/chair to the edge of the skirt, if you have the same distance all the way around, you're good to go!

I usually sew this using a running stitch, but if yours are not small enough, use a whip stitch. Another really easy hemming idea that was very common in the 18th century, twill tape! This adds some weight to the bottom of the skirt to help it fall. It also recieves the brunt of the dirt and wear and tear. If you're limited in number of petticoats, its very easy to 'spruce' one up by replacing the worn twill tape with new tape - the difference is amazing! It can be sewn on with the same method as the waist band - with no pleats of course!


Thats all there is to a petticoat... pretty simple but time consuming. If you're going to machine sew, please hand sew the bottom hem. It's one of the few edges seen on a petticoat and really does add the authenticity of your outfit. WEAR MORE THAN ONE! Shilouette is absolutly everything. One year I was in L'bourg Cape Breton and saw a lone woman standing on a hill with the sun behind her, it would have been a beautiful photo, except the wind was blowing, she only had one petticoat on and you could plainly make out the shape of her calves and thighs. In 18th century woman had no shape below the waist, except the bell of their skirts.


More to come later on the remaing journy of the caraco!

Tuesday, June 9, 2009

Cotton/Linen stays prt 2 - washing

soo.. These stays are not taking as long as I thought they would - which, in a way is a good thing. In another way, however, it makes me question why I haven't started my new pair!

One side is done but because they were handled so much for the hand sewing they have to be washed.
To wash a set of stays you must ensure what whatever is in your stays for the boning can stand up to water.
Its very simple to wash your stays, actually! Just get your laundry room sink washed out well, fill it 1/2 way with warm water and a little laundry detergent then add your stays. Don't froth them around the tub, gently move and flex them allowing the water to get into the fibres of the the stays and outer lining. This gentle movement should remove any dirt that's landed on them.
rinse your stays off with warm water again, you don't want it hot - if your stays have been pre-washed and dried you shouldn't have an issue but hot water can cause a small amount of shrinkage, especially in canvas and cotton ticking. rinse and repeat.

If your stays are REALLY dirty (you ate PB&J, played in the sandbox AND worked in the garden then came in and worked on your stays - you deserve to be hit soundly on the head and live with your dirty stays) let them soak in the warm water bath for about 30min to an hour and then repeat the gentle movements until your stains are gone.

do NOT ever use bleach. Bleach can damage the wood boning and the protective coating on metal boning. Bleach also weakens the fibres of a material, burning them away - the more often you bleach something the weaker it becomes. Stays are one thing that really do need the strength. bleach may also eat away the hand stitching - ruining your stays and costing you lots of money for a new pair

so - in conclusion, always wear your shift with your stays. not to mention it will be a million times for comfortable with a shift between you and your stays, the shift is easily washed and keep the dirt away from the stays.

hope this helps everyone!

Saturday, June 6, 2009

Cotton/linen Stays June 4-? 2009


Hello all,

I've started making a set of stays and I thought that you might like to see them, and their progress.

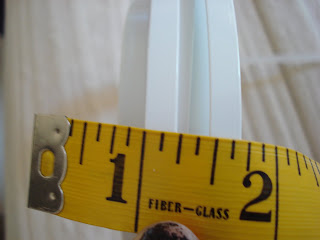
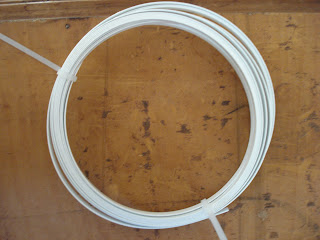
They are fully boned and contain 74 German spring steel bones, 48 hand turned button holes, 1.5meters of cotton ticking, 4.4 meters of linen twill tape, .5 meters of light blue linen. This set of stays are front and back lacing with no straps. The customer this is made for works in the UK at a small museum as an interpreter. If it seems like a lot to any of you its for a lady with a larger bust. Her measurements are
bust - 51"
waist - 40"
Center back torso length - 17"
Front Neckline Depth - 14"
bust to waist - 6.5"
Total torso - 40"
Side torso length - 10"

the stays measure
Bust - 38"
Waist - 26"
Center Front length to waist - 12"
Center side length to waist - 9"

The tabs at the bottom are approx. 2" long and rest over the waist to help support up the petticoats and skirts of the gown.

I use 1/4" German steel boning ordered from Farthingales, a really great company in Ontario, Canada. This boning doesn't rust, bend or break - it's very heavy, however.

Cotton thread is all that I use. 100% cotton quilters thread. It's stronger than regular thread and sews almost like its pre-waxed. My button hole thread is 40% polyester/60% cotton - I know, I know its got poly in it... I hit myself all the time for it but its the only thing I can find that sews remotely well.

I received this order quite a few weeks ago but due to circumstances the customer had back surgery and life of course takes over. We've both finally come back to this and have got the measurements and started this project.

I started with drafting the pattern - this took about 3 hours. I use a material with little red dots spaced 1" apart for my draft paper. this can be bought at any local sewing store and works great for drafting patterns.
I made this corset from 3 pcs for each side, L&R. being for a larger busted woman drafting these was a little harder than I had done before. It was a great challenge but it looks like it cam out great - you tell me.

I cut out the pattern and cut out 4 of each piece, 12 pcs of fabric in total. I then sewed 2pcs so I had a base for the boning channels. I now has 6 pcs, 3 L, 3R to put boning in. I drafted the boning channels and penciled them on.

I then machine sewed the channels for the corset. haha I think that waiting for my hubby to get home from work (he was on duty -Army- today... Saturday... I guess I can't complain. Really puts things in perspective when today is June 6th of all days) so he can use the bolt cutters to cut the boning for me.... I can't do it at all! I still have some to cut for the other side...

I've been working on one side more than the other, as you can see by the photo's I've got one side almost done. I then sewed the 3 pcs together Front, center, and back. The blue linen outer shell was then basted on the top along with the linen twill tape.

Then the dubious task of stitching on the cotton twill..... ugh. Anyone that has every sewn on any amount of lacing or twill tape - you share my pain.

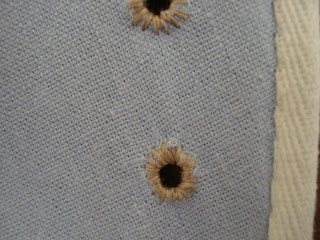
Well its all done on one side and I started the button holes. As you can see by the photo's the back is done... 1/4 of the button holes done... I now I might go overboard in the holes, but I have found in my own wearing that stays feel more secure and lace better with a few more holes. I'd rather put one too many that you can skip, than not enough that you're feeling loose in your stays.

My fingers hurt now from all the feverish sewing. I'll have more in a few days when the stays are done and the other side is done.

ooouuuuccchhhhhh. off to try a few more button holes - it will probably turn into 5 then 6.... now I'm just procrastinating :P

Welcome

Hello Everyone, Thank you so much for checking out my blog! I hope that you're all able to take away some valuable information about what the regular everyday woman would wear in the 18th century. I've only been re-enacting for 3 years now but I've jumped into it head first.

Now, a little bit about me (I know you're all dying to hear about it)

I started sewing when I was 2. Given it was just sitting on my mothers lap, helping her guide the material through the machine. I've loved it ever since.
When I was 4 I made my first pin cushion, a little blue star. My mother used to give me scraps from her projects and I would make doll clothes out of them. Using a few stitches here, a few there and voila, my barbies had clothes! I think my fabric obsession started there, I collected the scraps. I had boxes of them!

When I was 9 I started making teddy bears and stuffed animals for myself and friends. a few years later I began making clothes for myself with and without patterns. I loved experimenting with fabric and seeing what its limits were.

At 16 I worked at a fabric store and grew in my knowledge of fabric types, textures and the proper procedures to work it. When I was 17 I was offered the chance to go to an encampment at the Citadel hill, Halifax Nova Scotia. I loved it. I have been interested in history for quite a while and this was great! I began sewing historical clothing and have had wonderful teachers. They have been a great influence on me, answering questions and helping in research.
I have made clothing for various museums around New Brunswick and Nova Scotia for their interpreters.
I pride myself on historical accuracy make my clothing to be period correct. I focus on the French and Indian war (1754-1763) and the American Revolution war (1775-1783), however, I have made clothing for various other time periods such as regency, Victorian, 1940 etc.
My clothing is made as it would have been in the period. For my 18thc it is all hand sewn and constructed in period correct fashion. I love creating and making beautiful clothes!

I hope you all enjoy it and can give me some valuable feedback.

Also, check out my etsy shop @ www.bonniemissflora.etsy.com

If any of you would like to sign up for my monthly news letter for news about my shop, sales and interesting bits of info, please feel free to send me an e-mail!

Cheers everyone!

Rachel